After making dolls and plushies for a bit , there comes a time when you really would like to enlarge the plush toy pattern….but how?
It really isn’t as difficult as it sounds. There are two ways.
First Way– Go to a copy machine and pick how large you would like to enlarge the plush toy templates and enlarge/copy it. You might find yourself taping paper and pieces together to keep the templates usable, but this might be the easiest way. Just make sure that you have the same settings for each paper you are enlarging.
What if you don’t have a printer? Then the second way is for you!
1) Print off or copy the plush toy templates- making sure that you have enough space around the outside lines to add additional lines. You don’t want your new lines to go off of the paper. If there is no way around it, you can tape a few papers around it so you have a place for your pencil markings to go.
2) Taking a clear ruler- lay it on top of the template. This is where you need to make a decision….how large are you going? I typically start with enlarging the pattern 1/2 inch or so.
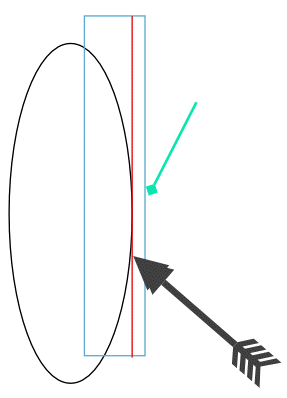
If you are able I would suggest putting a piece of colored tape or painters tape on the top of the ruler 1/2 inch {or whatever measurement you decide to enlarge the pattern by}. This will help you with the next step.
3) Line the edge of the template with the tape line- the ruler will be jutting past the drawn line 1/2 inch {or whatever measurement you decide to enlarge the pattern by}- this is shown in the diagram above with the dark arrow.
4) Taking your pencil you will run along the edge of the ruler -shown by the blue pencil in the diagram above.
5) Continue to slowly go around the template, adjusting the ruler and drawing a new line.
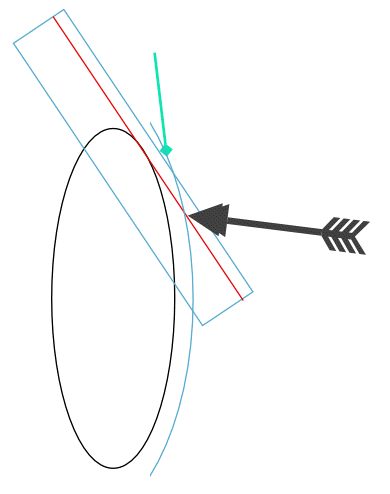
6) Continue this method until you hit the beginning of the line.
7) Using this method, enlarge all the other template pieces. You want to make sure you use the same increase for all the templates so they will match up when you sew them together later.


One Response
Robin
I use a program called Paint Shop Pro. I cut the pattern in quarter sections, separate and print each one.